

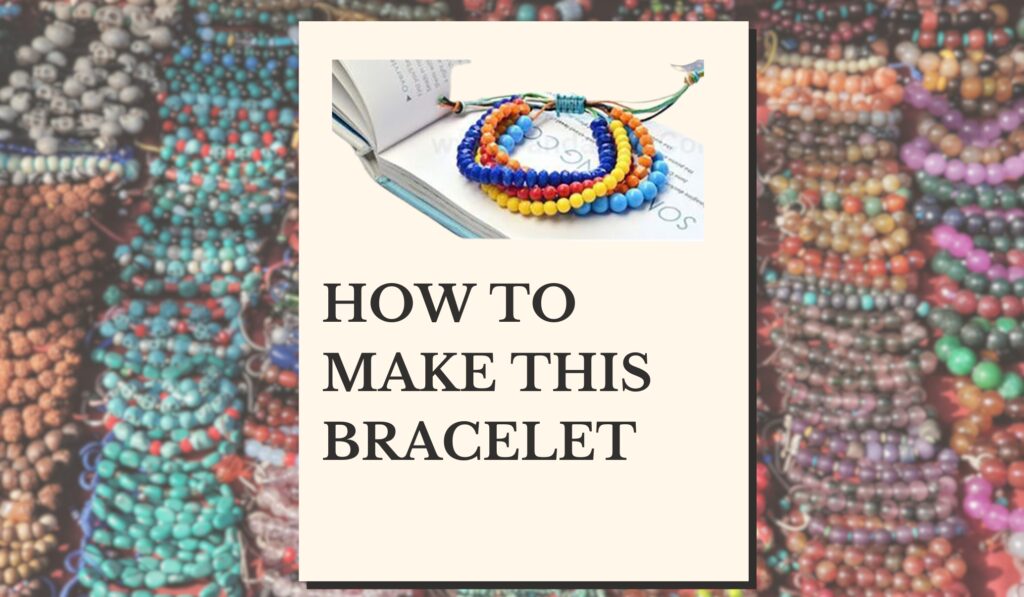
Hey there, lovely friends! Are you ready to learn a fun and stylish way to create your very own handmade jewelry? In this step-by-step tutorial, we’ll show you how to make a beautiful bracelet using the square knot macramé technique. Be sure to follow us on social media and visit our website, looksocute.com, for more amazing tutorials like this one. Let’s get started and explore the endless possibilities of handmade jewelry, transforming simple materials into fashionable accessories!
Materials:
- Waxed cords
- Beads or crystals in your favorite colors, 4mm or 6mm
- Scissors
- Lighter
- Glue for jewelry
Why Choose Handmade Jewelry?
Handmade jewelry has a unique charm that can’t be found in mass-produced items. It allows for personalization, creativity, and the opportunity to own something truly one-of-a-kind. Moreover, crafting your jewelry can be an incredibly rewarding and therapeutic experience. The process of selecting materials, designing, and assembling the pieces can be both relaxing and fulfilling, making it the perfect hobby or even a potential business venture.
Step-by-Step Guide to Making a Colorful Bracelet
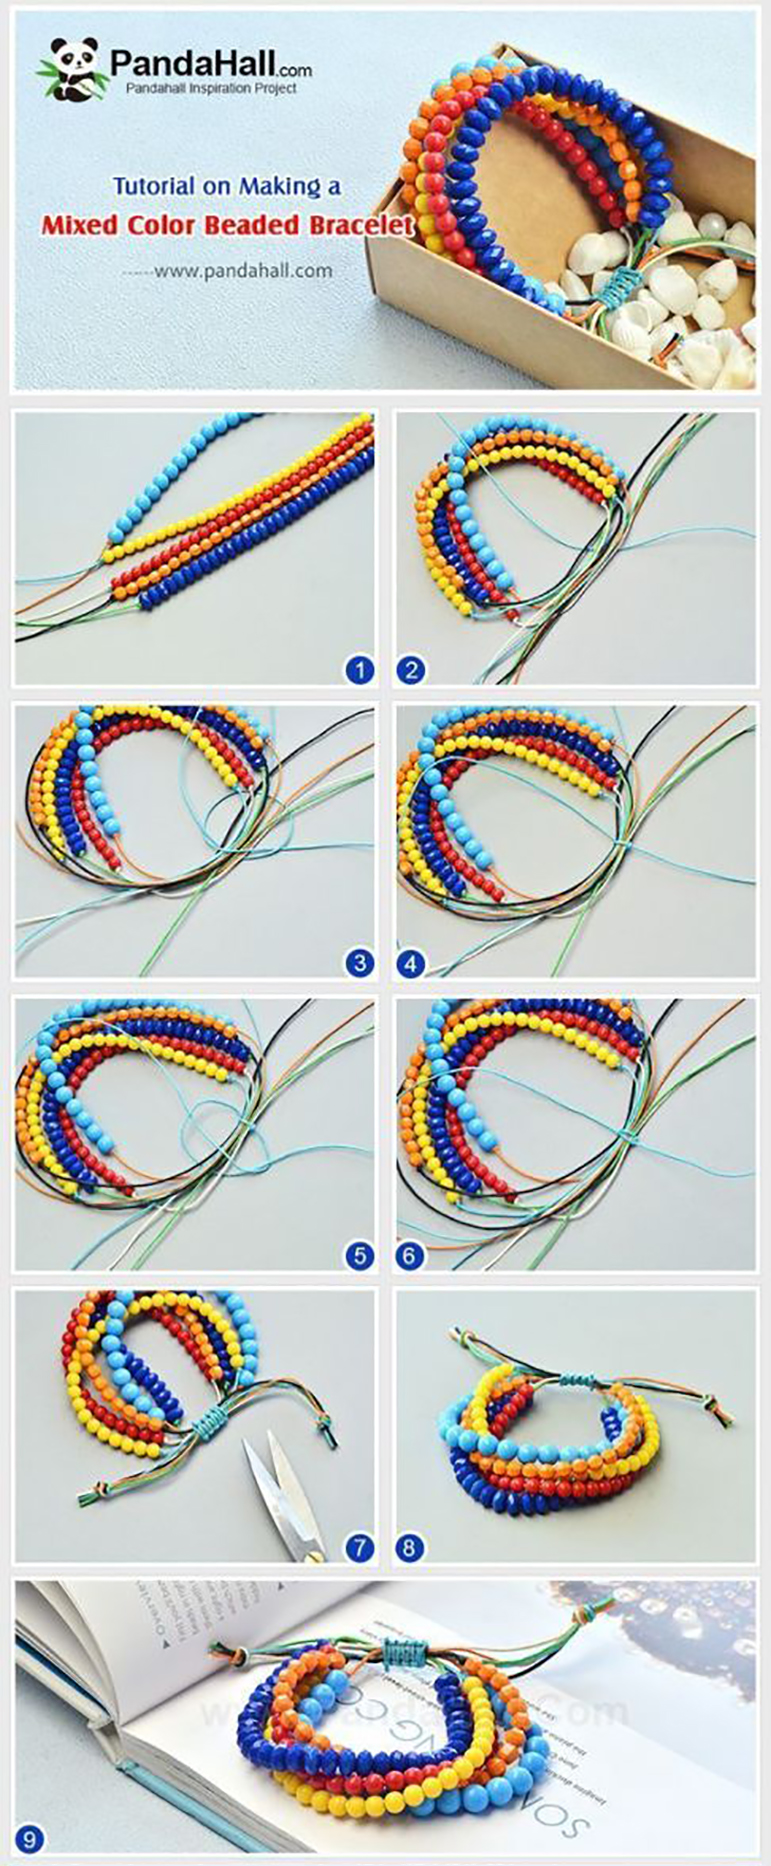
- Step 1. Preparation.
First, measure the width of your wrist and add 6 inches to it. Then, cut 5 waxed cords of that length. Carefully burn the tips of the cords to prevent fraying and make it easier to add the beads or crystals.
- Step 2. Add the beads and crystals.
Next, unleash your creativity with colorful beads or crystals. Thread the waxed cords through the beads – you’ll need approximately 20 beads on each cord. Experiment with different color combinations and patterns to make your bracelet truly unique.
After threading the beads, carefully hold both ends of the cord and test the fit on your wrist to ensure it’s the right size and style for you. If satisfied, tie a knot on the same cord at each end, close to the beads, making sure to leave extra cord for tying the bracelet later. (see photo 1) Repeat this process for the remaining 4 cords or however many cords you’ve chosen for your bracelet.
- Step 3. Connect the cords.
Now, as shown in photo 2, cross the cords of the bracelet, forming an “O” shape. Then, neatly extend the ends of the cords. To close the bracelet, we’ll use a macramé knot known as the square knot.
- Step 4. Square Knot.
At this point, cut another cord about 7 inches long and pass it under all the other cords. If you’re new to macramé, don’t worry! This technique is beginner-friendly, and with a bit of practice, you’ll master the art of creating intricate knots and designs.
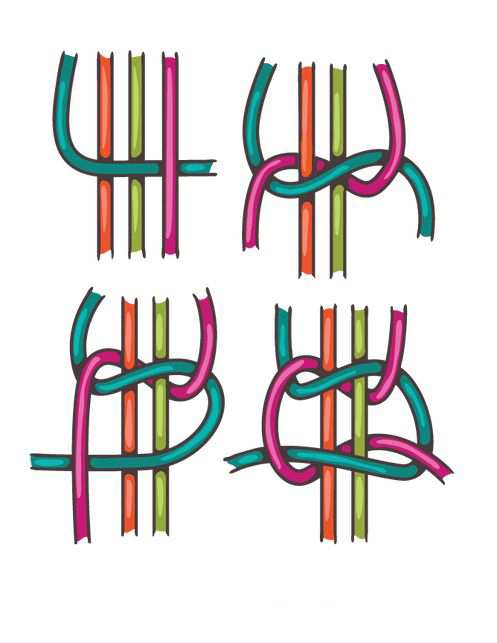
- Step 5. Repeat.
After that, repeat the square knot 6 times. As you become more comfortable with the technique, feel free to experiment with different knot styles and patterns to create even more stunning bracelets.
- Step 6. Finish the bracelet.
Finally, to finish the bracelet, trim the excess cord and carefully burn the tips, ensuring the square knot won’t come undone. You can burn the tips flush, which will cause the waxed cord to act as glue. If the knot still feels insecure, use jewelry glue and add just a small drop to each end of the square knot cord. Lastly, trim the cords at the ends of the bracelet to your liking and tie them all together in a final knot as shown in photo 7.
And there you have it, my fabulous friends! You’ve just created a stunning, handmade bracelet using the square knot macramé technique. Don’t forget to share your creations with us on instagram by tagging us or using our custom hashtag: #looksocute. We’d love to see your beautiful bracelets and celebrate your newfound skill. Remember to explore our website, looksocute.com, for more exciting tutorials and helpful tips on creating unique and fashionable handmade jewelry. Happy crafting, and here’s to many more delightful and stylish accessories in your future!